Quick Start Guide
Step 1 - ripping your CDs
Convenient as it may be, downloading music isn't as good as buying the CDs.
As CDs fall in popularity many can be had on eBay, Amazon etc. for £2 or so.
Having the original CD allows you to rip them as both MP3 (for convenience and meta-data) and also as WAV (quality). Seedeclip4 will then play the audio from the WAV file and use the art and info from the MP3 files - i.e. splicing the best bits together for you.
Apple's iTunes is a very popular way of doing this and it makes it especially easy to get both the MP3 and WAV files downloaded.
- When you insert the CD iTunes will ask you if you want to import it. Click on 'No'.
-
Now click 'Import CD', and choose MP3 + error correction, and wait until it's been imported.
Note: This error correction (and your computer grade CD reader) can get you a better copy of the CD data than your CD player.
-
Search in iTunes for the new album and select a track. Press CTRL-A/CMD-A to select all tracks, and then click on 'Properties'.
- Select the Artwork tab
-
Go-to the internet and find a nice image for the artwork.
-
Drag-n-drop it into the iTunes artwork space and press OK.
-
Your MP3 files are now ready for use.
-
Click 'Import CD', and choose WAV.
- When it asks you - select 'no not remove current tracks'
-
and wait until it's been imported.
-
Copy the new album (it's in the iTunes Media folder) to your collection as required and go to Step 2 below.
Step 2 - locating your music files
To play your music, the serve needs to know where they are.
- Use the Settings page to specify the directory(s)/Folder(s) where you keep your music.
-
At the top the list of 'Music file locations' fill in the server's directory where your music is.

For instance Windows this may be C:/Music etc.
-
To refresh SeeDeClip4's scan press 'Ok' on a location you've set.
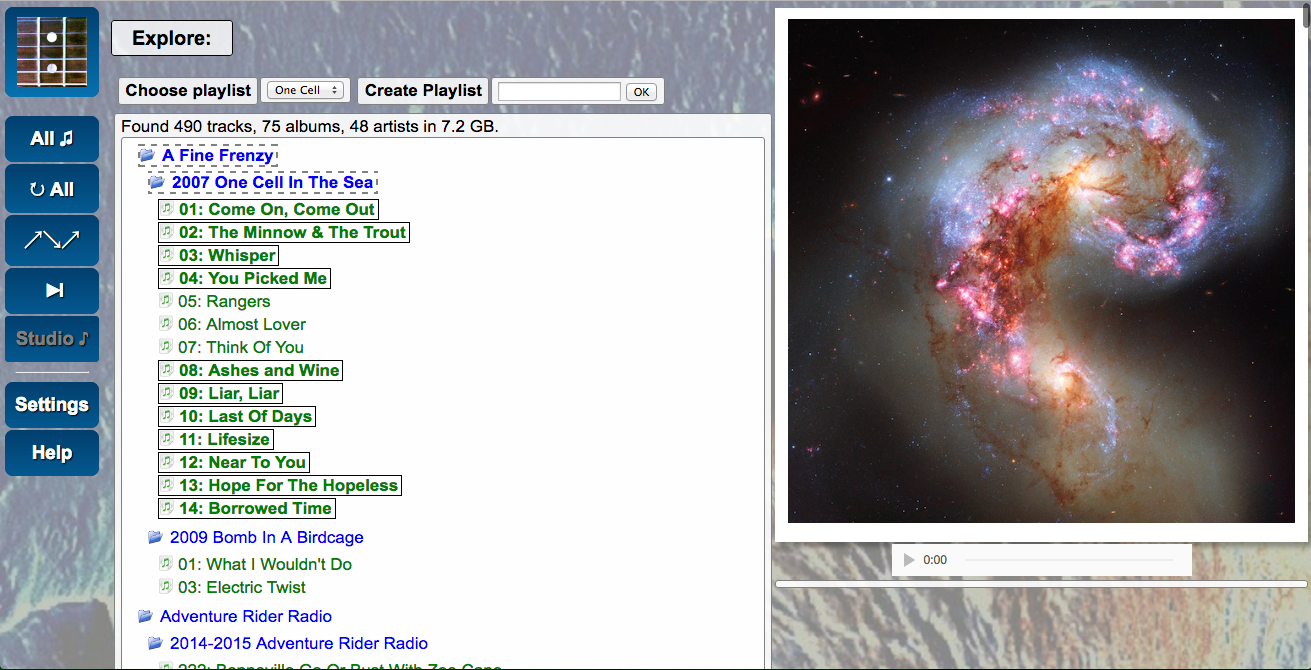
Step 3 - Explore
The main portal to your music is the Explore page.
Music here is laid out by artist and album.
Play a track
 | Click on the track name to play it immediately.
Click on the 'Next track' button to play the next cued track.
|
|---|
| Select/deselect for the playlist | Click on the left hand icon of the track to select/deselect for the playlist.
Once created a playlist is automatically updated when you select and deselect stuff.
|
|---|
The way SeeDeClip4 attributes the artist, album and track names to a track is determined by the Settings menu, the Information retrieval setting. This vital choice is not in iTunes but is really useful if you have a lot of WAVs around that you pulled from your CD collection. The meta-data contains this data if present, but in some files (and all WAVs) this data is missing.
The artwork works in a similar way, you can copy a file into the album directory or choose to favour the embedded (meta-data) art.
Unclassified files (i.e. with no meta-data) dumped in various 'misc' directories can be scooped up under Misc, so there is a setting for all the directory names you use to put these types of files in.
Exploring tips
- Artist order is alphabetical, album order is by date, then alphabetical, track order is by track number then alphabetical.
-
On a tablet the view is better in landscape. To go to full-screen scroll the screen up slightly and the browser tabs will disappear, giving you more space for the artwork.
-
To find a track or album use the browser's search feature.
-
If you have no artwork and can see the default cover images, find a nice picture on the internet and drag-n-drop it on top of the artwork. It's not a perfect system but you can successfully drop over 50% of the pictures on the internet this way. If the picture you chose doesn't work, move on and try another.
Step 4 - Play
Click on a track to play it.
Click on the icon to add/delete it from the current playlist.
Step 5 - Access from another device
Seedeclip4 is just a web-site, so you access it in a similar way to any website.
It does however need to be:
- Visible to other computers on your network.
You may wish to give a fixed IP address to your SeeDeClip4 machine, dynamic ones can change!
-
Found by your device.
Firewalls
Your server is always accessible from itself, but your firewall controls how visible port is to the outside world.
- When you start it on an Apple Mac the apple will ask you if it's OK to use that port.
-
On Windows you may have to adjust a firewall setting.
-
On linux it should Just Work.
Step 6 - Remote-Slave (Pro edition)
This allows you to position the audio slave next to your HiFi and use another device as the remote control.
- Position/connect a device to your HiFi and select 'Slave'.
-
On the your remote device (phone, PC etc) select 'Remote'.
-
Select your slave device on the Remote page. (refresh the page if required, you'll need to start the slave first).
-
Music played on the remote then comes out of the slave instead.
|
|
|